Practical relevance of calibration baselines and reference point fields
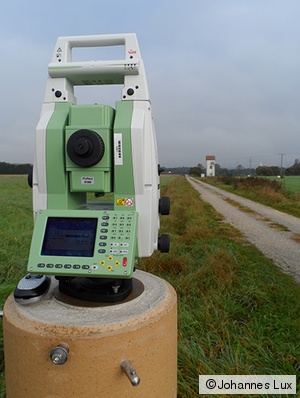
The Hessian State Office HLBG (Hessisches Landesamt für Bodenmanagement und Geoinformation) is aiming to increase the quality and quantity of calibration baslines in the Federal State of Hesse. For that reason, the Frankfurt calibration baseline in Neu-Isenburg has been reactivated and a new reference point field in Fulda was established. By providing numerous calibration baselines by the HLBG, engineering offices, officially authorised surveyors and surveying authorities are obligated to prove the used measurement instruments regularly. Instrument calibration is prescribed by law for sovereign tasks by surveying authorities and often mandatory for precise engineering geodesy. In almost all federal states in Germany, officially authorised surveyors are allowed to perform sovereign measurement tasks. The suitability of the used instruments must be proven by calibration reports or certifications.
Mobile laser tracker AT401 for traceable references
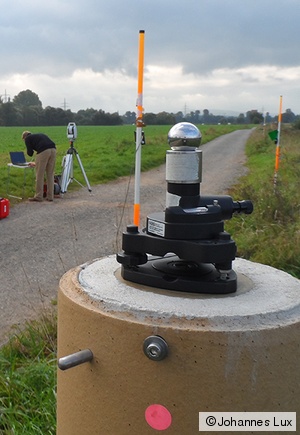
Testing, verification and calibration of measurement equipment and surveying instruments require highly accurate and traceable references. Modern total stations achieve an uncertainty of the distance measurement of less than 1 mm. Nevertheless, these total stations can not be used to derive nominal distance values on calibration baselines because the instruments do not provide a higher-level reference for instruments of the same class. In order to provide a high-precise and traceable reference, laser trackers are recommended. Laser trackers are polar measurement instruments equipped with a high-precision distance measurement unit. The specified uncertainty of an observed spatial position is less than 20 µm, and, hence, meets the accuracy requirements. The measurement uncertainty is mainly limited by the knowledge of the air temperature, the pressure, the humidity and the Carbon dioxide level used for the air refractive index determination.
The Laboratory for Industrial Metrology operates two modern laser trackers, namely the AT401 (Leica/Hexagon) and the Omnitrac 2 (API). In comparison to conventional laser trackers used in industrial facilities, both instruments are characterised by robustness (e.g. IP54 specification) and a high degree of mobility. For that reason, such kind of instruments are almost unrivaled in the framework of large volume metrology like EDM calibration baseline determination.
Results and objective
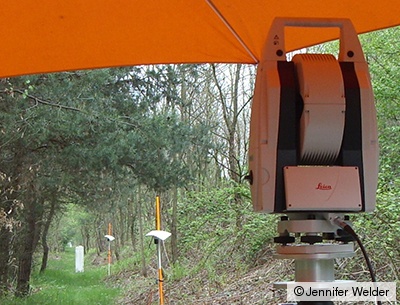
The Laboratory for Industrial Metrology collaborates with HLBG and measures calibration baselines and reference points fields of the Federal State of Hesse to obtain traceable nominal values. For the first time, mobile laser trackers like the AT401 are successfully used to determine the full set of nominal values of EDM calibration baselines, and to ensure the aimed accuracy goal. In the meantime, further institutes have adopted the measurement procedure accordingly. The measurement results are used to obtain nominal values with superior accuracy but also to check the stability of newly constructed baselines. Representative meteorology parameters are measured along the baselines by a transportable multi-sensor network. These environmental parameters are used to obtain the first velocity correction following the recommendation of the International Association of Geodesy (IAG).
EDMFit
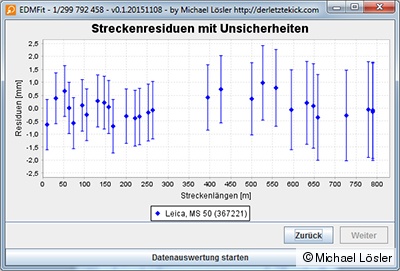
For data analysis, the in-house software package EDMFit is developed and is applied. The open-source software package reduces and corrects the raw measurement values. The implemented least-squares adjustment yields the reference distances of the calibration baseline. The least-squares adjustment is formulated by a Gauss-Markov model.
According to the Guide to the Expression of Uncertainty in Measurement (GUM), the uncertainties are obtained by means of Monte-Carlo simulations and takes the specified probability distributions of the quantities rigorously into account. In order to calibrate the EDM unit of a total station, the determined reference distances of the calibration baseline as well as the fully populated dispersion matrix are introduced to the adjustment process. Hence, the uncertainties of the instrument under investigation and the uncertainties of the laser tracker measurement is considered within the data analysis.
Eschelbach, C., Heckmann, B., Lösler, M.: Hochgenaue Sollstreckenbestimmung mit einem mobilen Lasertracker an der Kalibrierbasis Neu-Isenburg. avn - Zeitschrift für alle Bereiche der Geodäsie und Geoinformation, 122(3), pp. 95-101, 2015.
Eschelbach, C.: Refraktionskorrekturbestimmung durch Modellierung des Impuls- und Wärmeflusses in der Rauhigkeitsschicht. Committee for Geodesy (DGK) of the Bavarian Academy of Sciences and Humanities, Series C, 638, Munich, 2009. ISBN: 978-3-7696-5047-1; Identical with: Schriftenreihe des Studiengangs Geodäsie und Geoinformatik, Universität Karlsruhe (TH), 1, 2009. DOI: 10.5445/KSP/1000009823
Prof. Dr.-Ing.
Cornelia Eschelbach
Phone: +49 (0) 69 1533-2356
cornelia.eschelbach(at)fb1.fra-uas.de
Dr.-Ing.
Michael Lösler
Phone: +49 (0) 69 1533-2784
michael.loesler(at)fb1.fra-uas.de
Address
Transfer centre
Steinbeis Transfer Centre Applied Geodesy
https://applied-geodesy.org
Member of SCGD
Member of the Society for Calibration of Geodetic Devices e.V. (SCGD)

